GROMACS is a popular open-source molecular dynamics simulation software that can simulate the behaviour of complex molecular systems. GROMACS was initially developed in the early 1990s by researchers at the University of Groningen in the Netherlands, and has since been continuously updated and maintained by a large community of developers throughout the world. GROMACS is well-known for its high performance and efficiency, making it an ideal tool for simulating a wide range of chemical and biochemical systems, including proteins, nucleic acids, lipids, carbohydrates, and polymers. It has a wide range of capabilities, which include energy minimization, molecular dynamics simulations, and free energy calculations, as well as tools for analysing and visualising simulation results. GROMACS has an easy-to-use interface and a lot of documentation, which makes it an excellent starting point for beginners.
In this tutorial, I’m going to show you the easiest way to install GROMACS on Windows and Linux operating systems through online software repositories. This method is especially suitable for beginners and still provides you with a recent (not the latest) and high-efficiency code if your computer does not have special hardware like high-end graphics processing units (GPUs). In addition, in the final part, I will teach you how to build a specific version of the programme, which can run simulations extremely fast on high-end NVIDIA GPUs by compiling the latest GROMACS source code.
Follow me on LinkedIn
Note: This blog is the text version of the GROMACS installation video tutorial. You can Watch the video here or on the Insilicosci YouTube channel. You can also copy and paste commands from this page if you prefer not to type them.
Downloads
GROMACS is a free software you can download its source code from the GROMACS website.
To get the GROMACS test simulation input files, click the button below.
You can extract files after downloading by the following command:
tar -xvf ~/Downloads/gromacs_sample_input.tgz
Note: I assumed you have downloaded the compressed file in the Download folder. If the file is in a different location, change the path in the cd command.
GROMACS Installation on Ubuntu
Installing GROMACS via the Linux package manager
The first thing to do is check your Linux version because the version of GROMACS that you get through this method depends on your Linux version. So, open a terminal window and enter the following command:
lsb_release -a
The output looks like this:
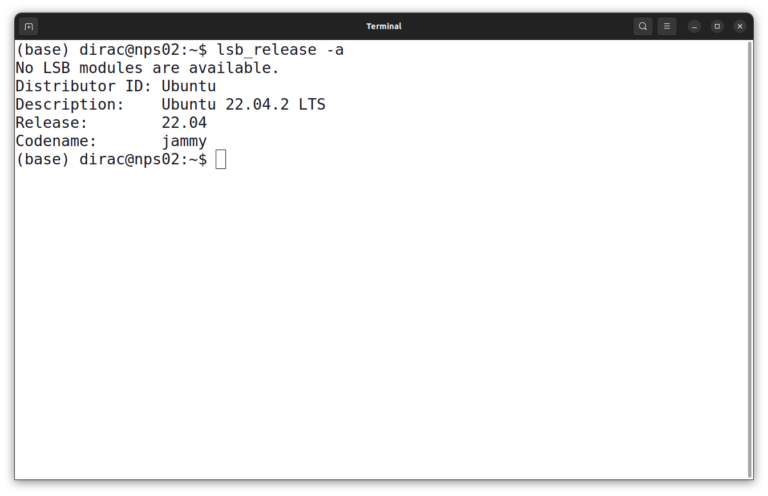
In this instance, it is Ubuntu 22.04 LTS. Then you should update the package index of your system.
sudo apt update
Now you search which version of GROMACS is available.
sudo apt search gromacs
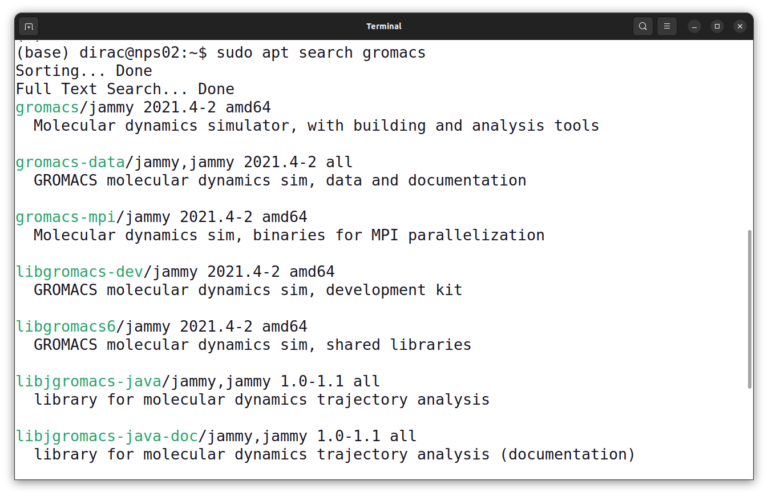
On Ubuntu 22.04, the name of the package is gromacs, so you can install GROMACS with this command:
sudo apt install gromacs
After installation, you can check where the GROMACS binary is installed with the following command:
whereis gmx
Running a sample GROMACS simulation on Linux
Caveat: this is not a complete GROMACS simulation protocol; it only includes the energy minimization part and is merely intended to check whether the program works properly on your system.
First, download the sample input file. And then, open a new terminal window and then move to the folder where you want to perform the simulation. For example, if you want to do the simulation on your desktop, the command is like this:
cd ~/Desktop
Then extract the sample input files using the tar command:
tar -xvzf ~/Downloads/gromacs_sample_input.tgz
Caution: I assumed you have the compressed file in the download folder. If it is not, change the path.
After extraction, go inside the sample input folder and check the files.
					cd gromacs_sample_input/
ls
There must be two files: 2wfu.pdb and em.mdp.
Now use the pdb2gmx command to produce topology and coordinate files.
gmx pdb2gmx -f 2wfu.pdb -o protein.gro
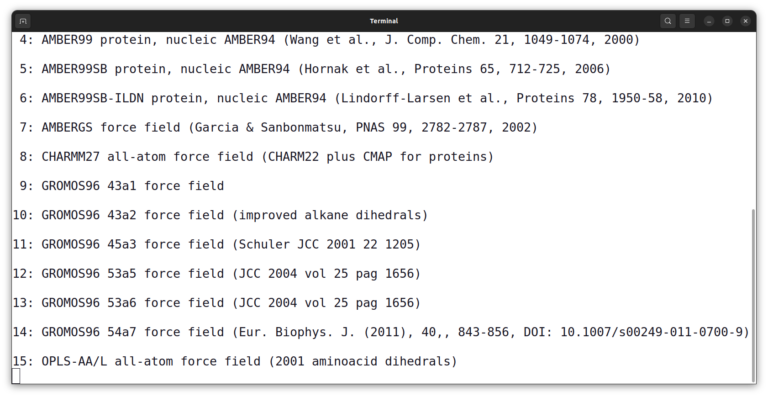
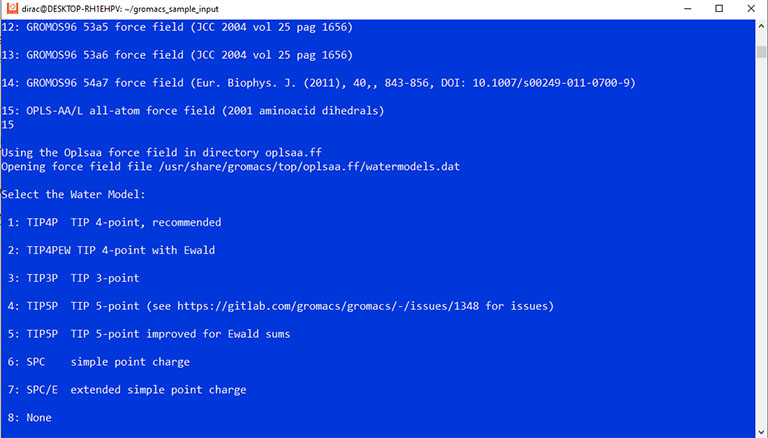
The program asks you to select a force field. Enter number 15 and press enter.
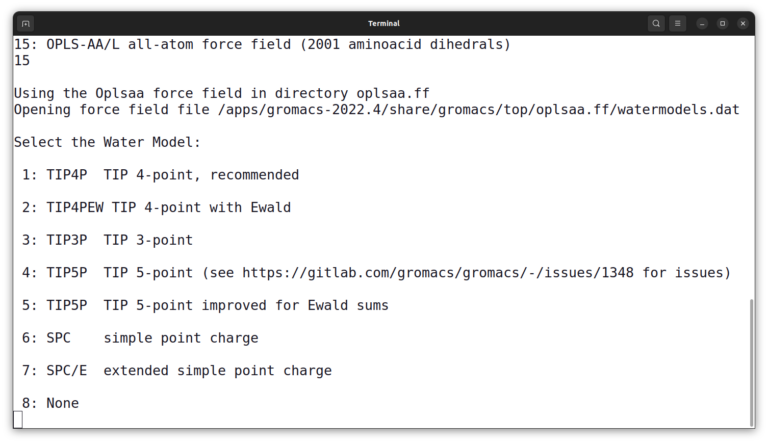
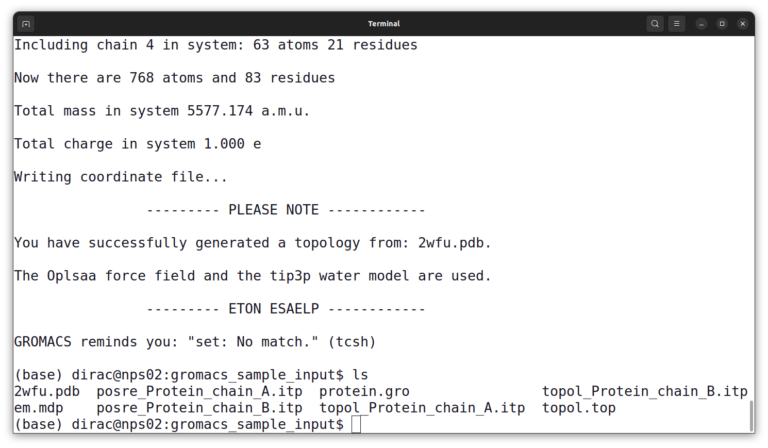
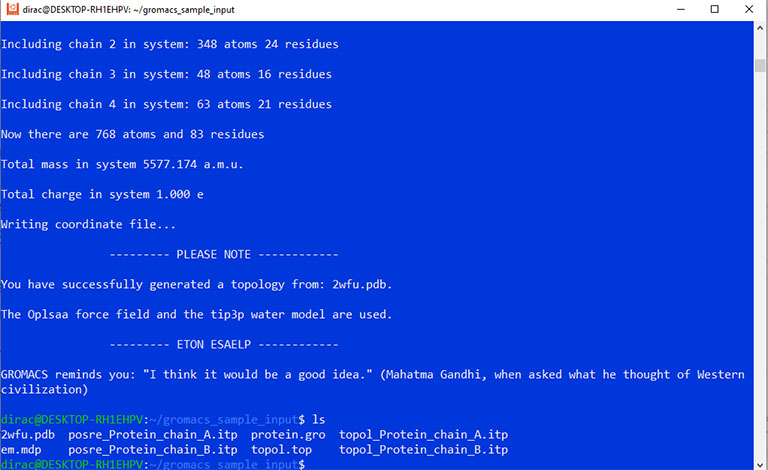
And then, select number 3 to choose the TIP3P water model. And list files again by the ls command. The output should look like this:
At this point, you have several input files. And you must combine all of them into a binary input file (.tpr) file using the grompp command.
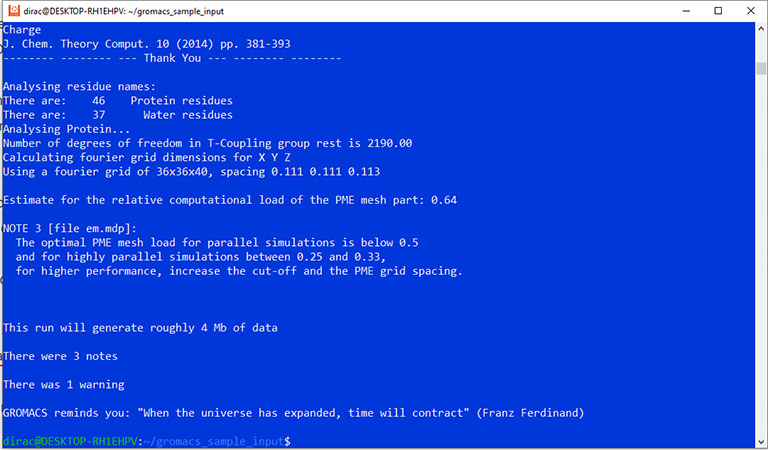
gmx grompp -f em.mdp -p topol.top -c protein.gro -o em.tpr -maxwarn 1
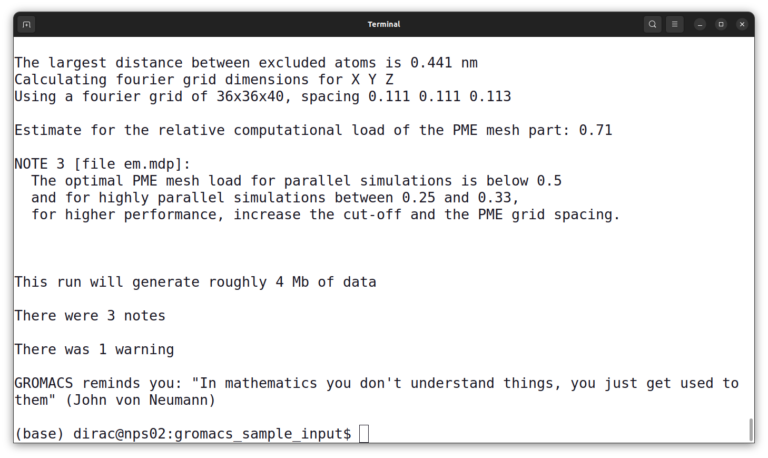
It will give you a warning and some notes but it’s okay.
Finally, you can run the sample simulation using the mdrun command.
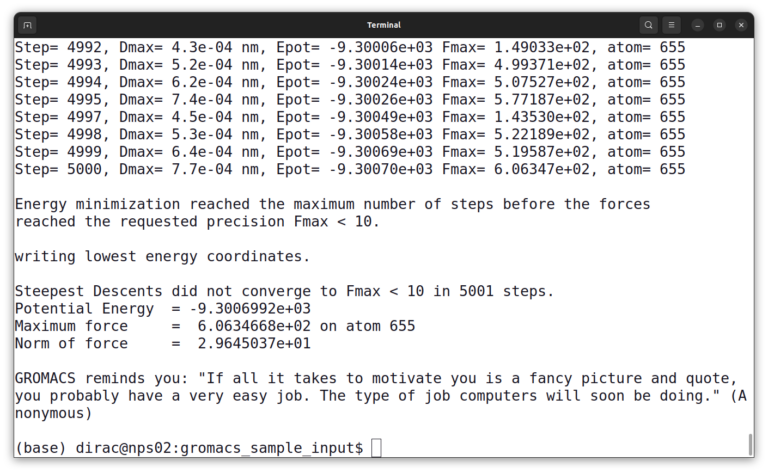
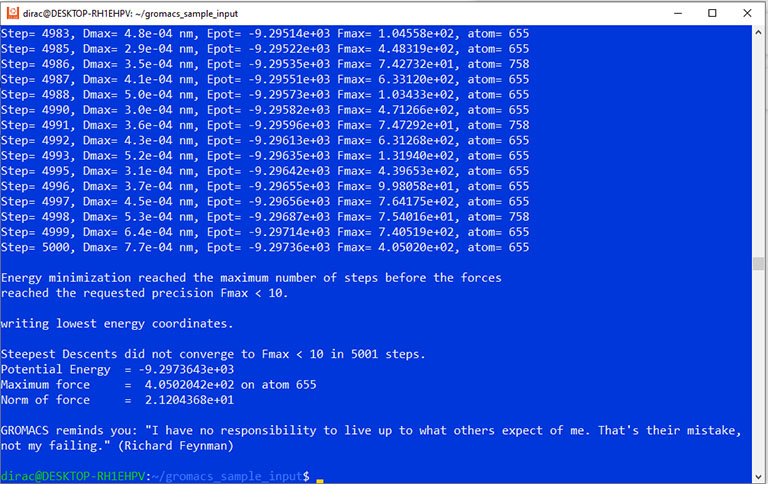
gmx mdrun -v -deffnm em -ntmpi 1
The simulation output should look like this:
GROMACS Installation on Windows
Although we can compile and install GROMACS directly on a Windows OS (see this link), there’s no point in doing so because GROMACS works better in Linux, and employing GROMACS on Linux is a significantly better experience. However, if your computer runs on Windows and you wouldn’t like to switch to Linux, there is a simple solution. And it is called virtualisation. Virtualisation is a technology that creates virtual representations of computers inside a physical computer __something like what is shown in the Inception movie. In this method, we install a Linux system inside Windows and GROMACS on the Linux.
In the past, we had to use third-party software such as Oracle VirtualBox to install a virtual Linux on Windows. However, starting with Windows 10, a native Windows feature called Windows subsystem can perform virtualisation. And, because the Windows subsystem for Linux is more integrated inside the Windows environment and easier to install, I prefer it to the third-party virtual machine software.
Install Ubuntu on the Windows subsystem for Linux
Installing Linux on a Windows subsystem is a straightforward task. You must enable the Windows subsystem first and then pick Ubuntu or any Linux from the Microsoft store.
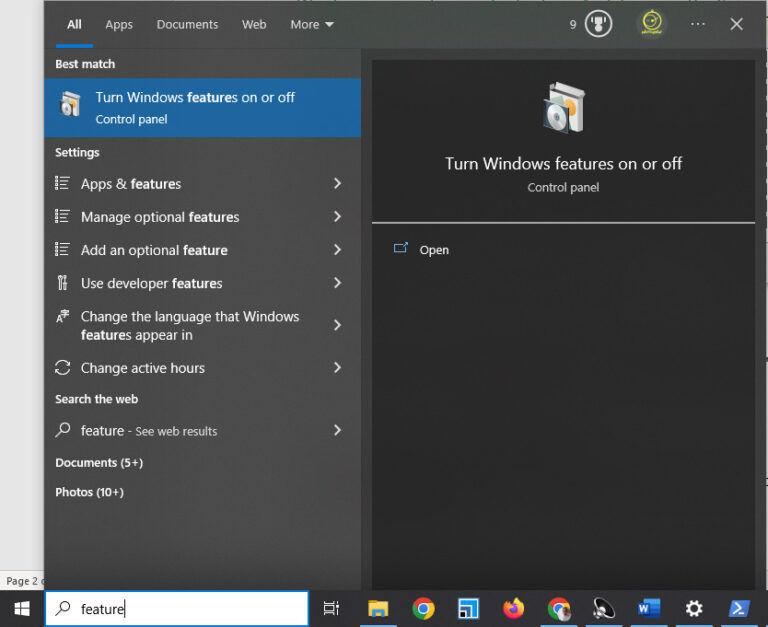
To do so, press the Windows key, type “features,” and click “Turn Windows features on or off.”
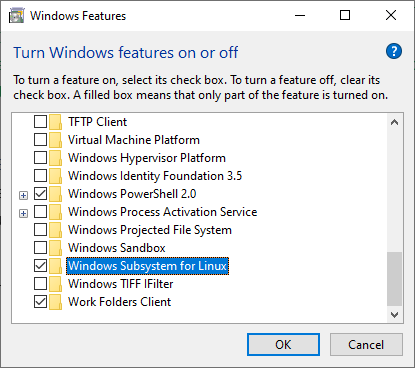
Then a new window appears. Find and tick “Windows Subsystem for Linux” and click OK. And after that, restart your system.
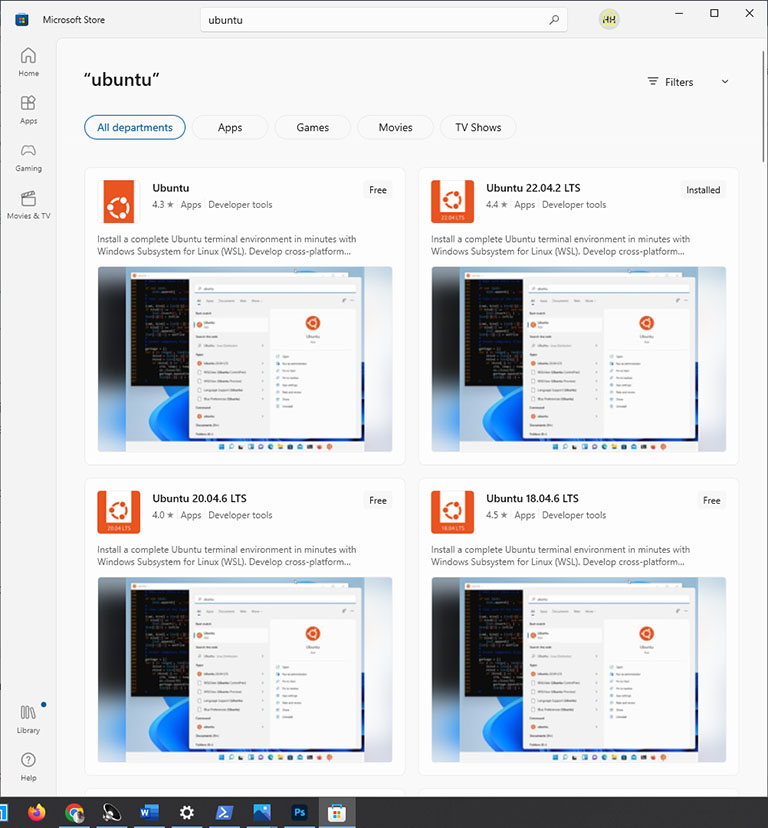
After restarting your computer, find and open Microsoft Store. And then, search for Ubuntu in the Microsoft Store. Select the latest version of LTS Ubuntu and click on the Get button.
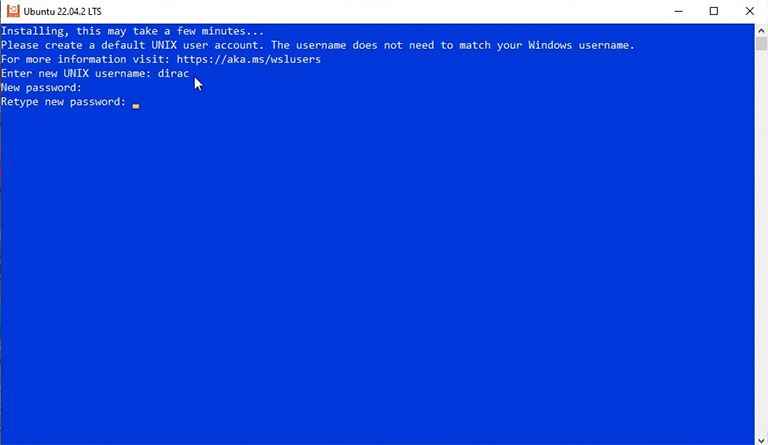
After downloading, press the Windows key, type Ubuntu, and click on the Ubuntu icon.

It takes a few minutes for the new system to become ready, and then you must enter a new username and password.
Note: When typing the password, you see nothing, but it’s OK. Just keep typing and press enter.
Now you have a text-based Linux on your Windows system, which means it doesn’t have any graphical user interface. But it’s pretty sufficient because GROMACS don’t need graphics for performing simulations, and you can do graphical jobs inside the windows.
Note: You can install a Linux with a graphical interface in the newer version of Windows Subsystem for Linux (WSL2). WSL2 is available from Windows 10 Build 19044+. See this page for more information.
Installing GROMACS inside Windows Subsystem for Linux
Installing GROMACS on WSL is similar to installing GROMACS on a physical-based Linux.
To start, update the package index list of Ubuntu.
sudo apt update
And then install GROMACS by the following command:
sudo apt install gromacs
GROMACS is now ready, and you can run a test simulation. However, before doing so, you need input files for a sample simulation, which can be downloaded from here.
Running a sample GROMACS simulation on Windows
Running a GROMACS simulation on WSL is like running on a physical-based Linux. However, there is a catch. Locating the downloaded sample files on the subsystem Linux is a bit challenging.
Whenever you open the subsystem Linux, it puts you into your home directory with the /home/username address. But the host Windows files are in the /mnt folder. In the subsystem Linux, you can check the Windows download folder by the ls command:
ls -lrt /mnt/c/Users/username/Downloads/
And extract the downloaded file on the Linux home directory by the following command:
tar -xvzf /mnt/c/Users/username/Downloads/gromacs_sample_input.tgz
Now, go inside the GROMACS sample input folder by the cd command:
cd gromacs_sample_input/
Then process the PDB file by the pdb2gmx command:
gmx pdb2gmx -f 2wfu.pdb -o protein.gro
The command asks you to choose a force field and a water model. Enter 15 and 3 to select the OPLS force field and the TIP3p water model.

Now you must have a coordinate file with the .gro extension, a topology file with the .top extension, and an input options file with the .mdp extension.
At this point, use the grompp command to combine all these files into a GROMACS binary input file with the .tpr extension.
gmx grompp -f em.mdp -c protein.gro -p topol.top -o em.tpr -maxwarn 1
The output should look like this:
Finally, you can run the test simulation with the mdrun command.
gmx mdrun -v -deffnm em
install GROMACS with GPU support
Compiling the source code of GROMACS is another method of installing it. And it is arguably the most challenging method to install GROMACS. So why would someone bother applying this method? This question has three possible answers.
- You may want to compile GROMACS with special features, like the ability to run on GPUs.
- You want to have the latest version of GROMACS.
- You may have a particular Hardware or operating system with no precompiled binary file for them.
Because of the excellent performance of GROMACS on Graphical processor units (GPUs), the most frequent reason to compile the source code is to have a GPU-enabled version of GROMACS. So, in this section, I will show you how to build a CUDA-enabled GROMACS from its source code to run molecular dynamics simulations on Nvidia GPUs.
To run simulations on GPUs, you need a decent CUDA-enabled graphics card. All recent Nvidia graphic cards are CUDA-enabled; however, running simulations on a low-end video graphic card will not improve performance significantly. Another prerequisite for compiling a CUDA-enabled GROMACS is to install the CUDA toolkit. And also You must install an Nvidia proprietary video card driver on your system to run the CUDA-enabled GROMACS. Therefore, first, I will show you how to install the CUDA toolkit and a proprietary graphics card driver.
Installing the CUDA toolkit and proprietary graphic card driver
It’s a straightforward task. First, open the Nvidia CUDA toolkit download page, choose Linux, and then choose your computer architecture. If you don’t know your computer architecture and your computer has an AMD or Intel CPU, choose the x86_64. And then, select your system’s Linux distribution.
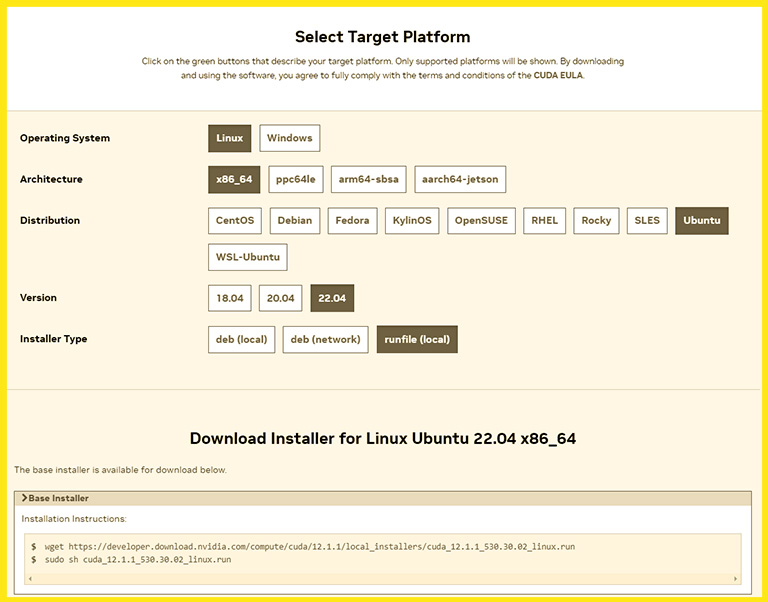
Nvidia suggests three different ways to install the CUDA toolkit. The run file (local) method is the most reliable and has the slightest chance of errors. And after selecting it, it gives you two commands to install the CUDA toolkit.
The wget command downloads a relatively big installer file that takes a few minutes. The second command runs the installer file.
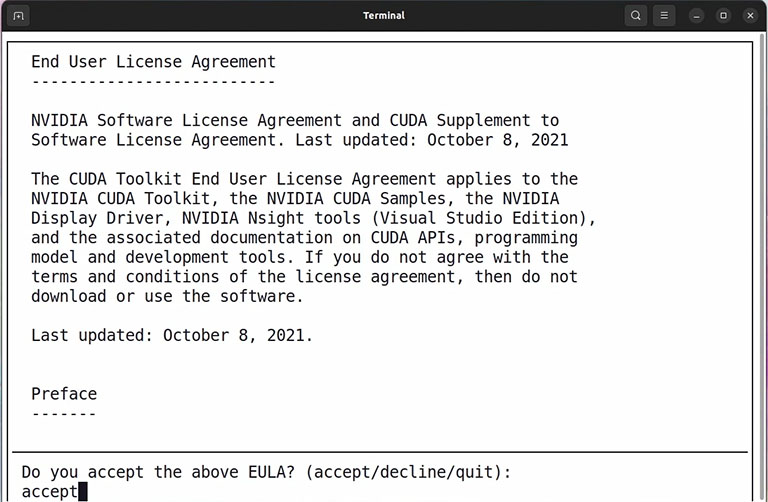
It takes a few seconds, and then type accept and press enter.
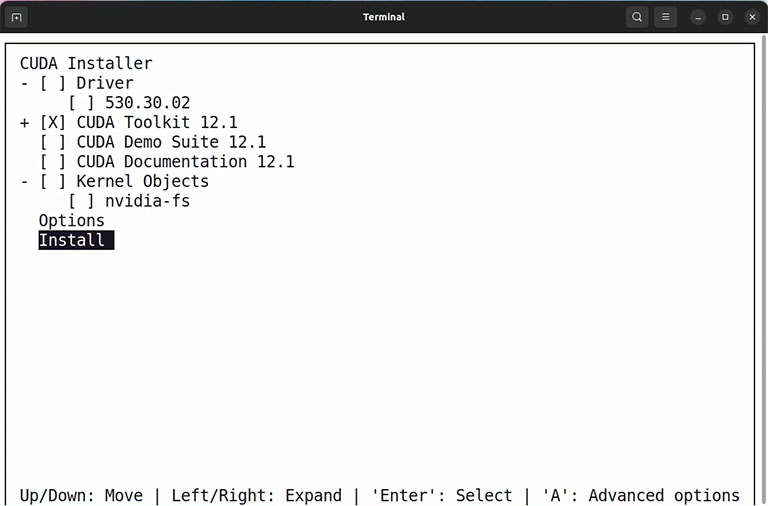
Then you must choose what components you want to install. For compiling GPU-enabled GROMACS, we don’t need CUDA Demo and CUDA documents. Also, if you already installed a proprietary Nvidia driver, you can uncheck the driver option and only install the CUDA toolkit. Follow the installer procedure until it says you have installed the CUDA toolkit on your computer, and then restart your computer.
Note: Sometimes, installing the proprietary Nvidia driver conflicts with your current driver. In this case, rebooting your system into text mode and running the installer in text mode can solve the problem. Also, installing the proprietary Nvidia driver separately through the software updater app in Ubuntu is more accessible.
Installing the CUDA toolkit through the Ubuntu package manager
The Linux package manager in Ubuntu provides an easier way to install the Nvidia driver and CUDA tools.
First, search nvidia-driver in the package index list by the following command:
sudo apt search nvidia-driver
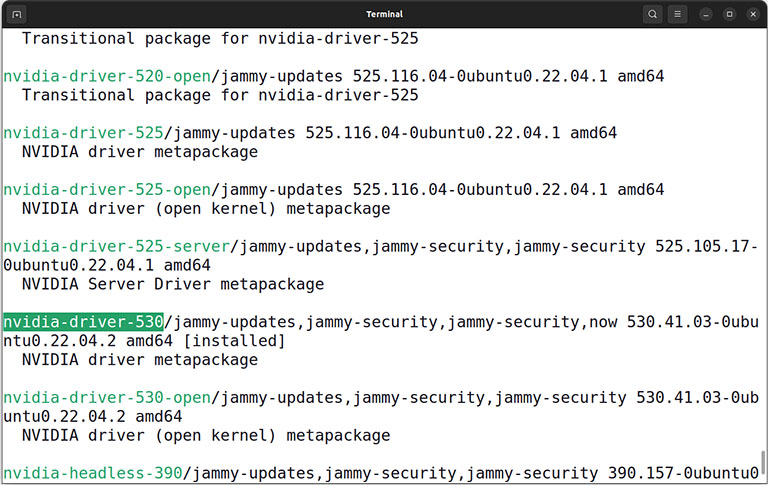
Then find and install the latest Nvidia driver version alongside the Nvidia CUDA toolkit.
					sudo apt install nvidia-driver-xxx
sudo apt install nvidia-cuda-toolkit
Caution: Replace xxx with the actual version number
Compiling GROMACS source code with GPU capability
Having the Nvidia CUDA toolkit, you can build a GPU-enabled GROMACS. However, you need a compiler and a few other applications before compiling the code. You’ve probably already have them on your computer, but just to be sure, run the following command:
sudo apt install -y gcc cmake libpomp-dev hwloc libhwloc-dev
Then, download the latest GROMACS source code from its website.

The source code comes in a compressed archive file; you must extract it somewhere before using it. For example, you can extract it on your desktop by the following commands:
					cd ~/Desktop
tar -xvzf ~/Downloads/gromacs-20xx.tar.gz
Caution: Replace xx with the exact version number you have downloaded.
Now create a new folder named build inside the GROMACS source code folder and move inside the folder.
					mkdir gromacs-20xx/build
cd gromacs-20xx/build
Inside the build folder, use the cmake command to configure the code files.
cmake .. -DGMX_BUILD_OWN_FFTW=ON -DGMX_GPU=CUDA -DCMAKE_INSTALL_PREFIX=/opt/gromacs-20xx -DCMAKE_C_COMPILER=gcc -DGMX_HWLOC=ON
The DGMX_GPU=CUDA option forces the compiler to build a CUDA-enabled binary file.
The DGMX_HWLOC option is not necessary but makes GROMACS better estimate simulation time.
The DCMAKE_INSTALL_PREFIX specify the location for installing GROMACS binary and force field files.
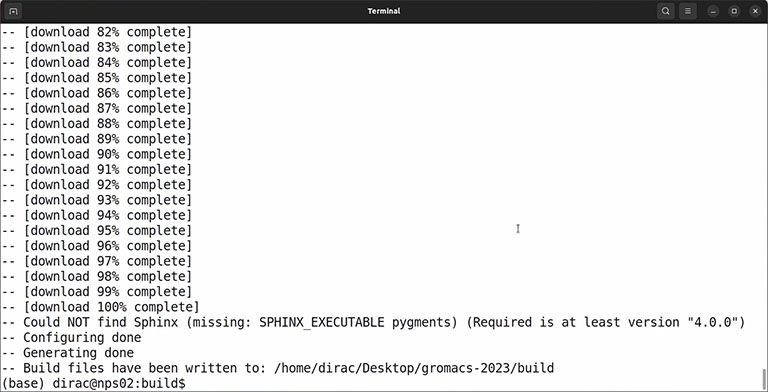
If everything is okay and the output doesn’t contain any error, you can compile the code by the make command:
make -j n
Caution: Replace n with the actual number of system CPU cores.
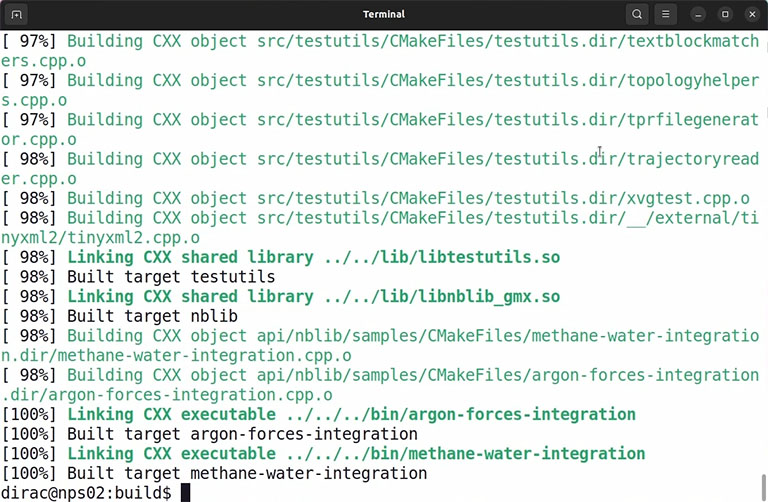
If the compilation is complete without any error, you can install the code by the following command:
sudo make install
Now, the GROMACS files must be in the location specified by the DCMAKE_INSTALL_PREFIX option. In my case, it is in the /opt/gromacs-20xx/ folder. Locate the GMXRC.bash file in the GROMACS bin folder and then open your bashrc file.
gedit ~/.bashrc
Add the following line at the end of the file and save it.
source /opt/gromacs-20xx/bin/GMXRC.bash
Caution: Change the path of the GMXRC.bash file according to your installation location.
Exit and reopen the terminal window, and it’s done. Now you can use GPU-enabled GROMACS with the gmx commands.
To run a test job, please see the Running a sample GROMACS simulation on Linux section.
let me know how to run gromacs in WSL with GPU
please tell how to run (UHD Graphics 620) GPU in WSL
Great article, installing GROMACS on Windows and Linux has never been easier thanks to your clear and straightforward instructions!
I was had error when make compile with:
CMake Error at cmake/gmxManageCuda.cmake:116 (enable_language):
No CMAKE_CUDA_COMPILER could be found.
Tell CMake where to find the compiler by setting either the environment
variable “CUDACXX” or the CMake cache entry CMAKE_CUDA_COMPILER to the full
path to the compiler, or to the compiler name if it is in the PATH.
Call Stack (most recent call first):
CMakeLists.txt:699 (include)
So I solved by this code:
export CUDA_HOME=/usr/local/cuda
export LD_LIBRARY_PATH=$LD_LIBRARY_PATH:/usr/local/cuda/lib64:/usr/local/cuda/extras/CUPTI/lib64
export PATH=$PATH:$CUDA_HOME/bin
I want it help for other one with the same problem.